Thursday, November 1, 2007

Catching up with the truss building

My mom pointed out that I skipped over some important stuff, so bear with me as I describe building the trusses for the shop.

The plans I worked from (I'm to the point now in June of '08 that I'm mostly done with the plans, now comes the wiring and finish details) described building the trusses yourself vs. having them farmed out. I simply had to cut 8 2x4's to length and angle, then using a jig laid out on the floor of the shop, assemble the trusses, with gussets and construction adhesive.


Mark cut these pieces on the right to size using his Radial Arm saw, which really helped with the accuracy of the trusses.


Here I am cutting the larger gussets to size. They were used to attatch the two halves together


I used my tablesaw crosscut sled to gang cut a notch in some of the upper truss pieces for the end trusses for the perlins to fit into. In the end, however that proved unnescesary because of the metal roof I wound up using. The blocking for the metal roof did a great job of tying the all of the trusses together.

After cutting all of the pieces, (and re-cutting some when we had to rebuild a couple of the trusses) a pattern was laid out on the floor of the shop, and the pieces were nailed and secured with construction adhesive.


Here is Mark using the semi-famous Polish Polearm to muscle the first two trusses up on the end of the shop. We did those two the hard way as it turns out, putting them up together including the perlins, which realllly made it a) heavy and b) unwieldy.


the rest of the trusses were installed individually. Grizz helped on that job, and without the two of them plus Lori and the boys my shop would still be in the dream stage.


Jumping forward a bit, here's how things looked once we had a few more trusses installed.


Afer that, it was 'time' to install sheathing for the roof. I made this neat jig to help get the sheathing up on the shop. In the end, we wound up removing the sheathing to put the blocking up on the roof, but here was how the sheathing went up.

The sheathing went up on those two boards screwed to the joists, there were plywood stops which would catch the sheet allowing me to climb the ladder without having to carry the 5/8 ply sheathing.

Saturday, July 28, 2007

Walls are up and sheathed!


Boy have I got a lot to chat about.

when last we met, our intrepid hero had just finished framing half of the front wall of the shop...

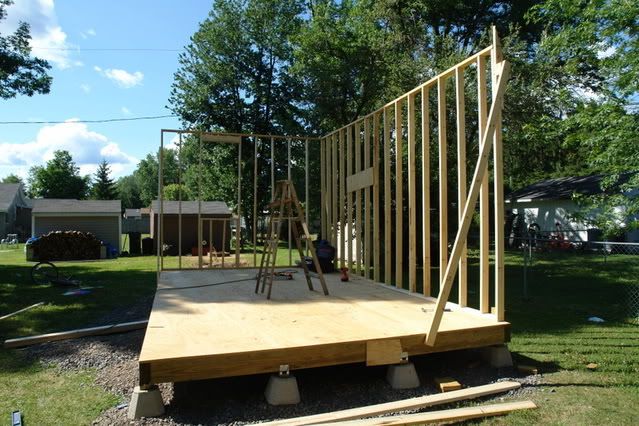
The rear wall was originally framed as one unit, but since 20' lumber is hard to come by, I had to effectively put it up as two sub units. (funny thing when a nail tears out the board goes 'skriiitch' which I can attest is NOT a pleasant sound at all)

SO, on the front wall, I decided that two halves were better than one long wall which would no doubt go skriiitch again.

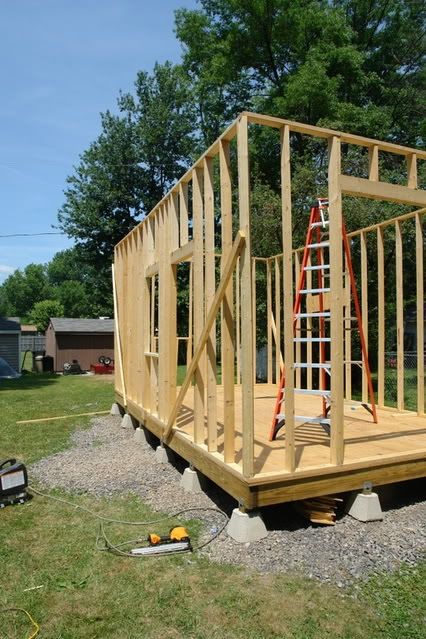
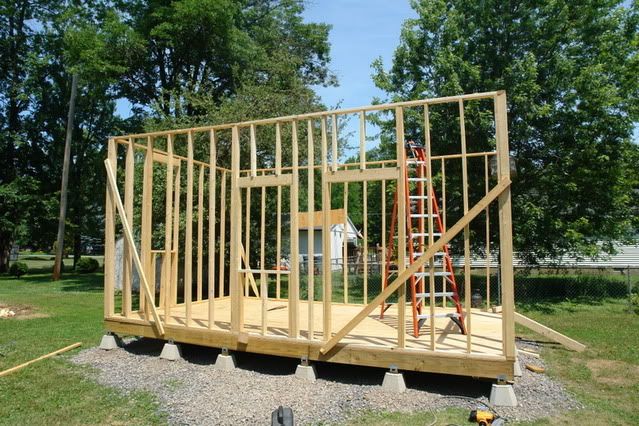
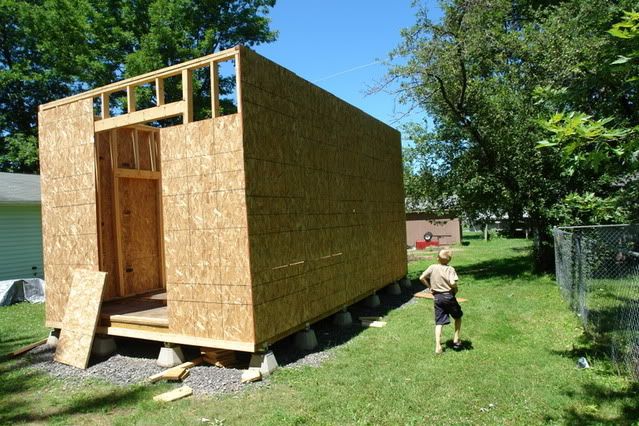
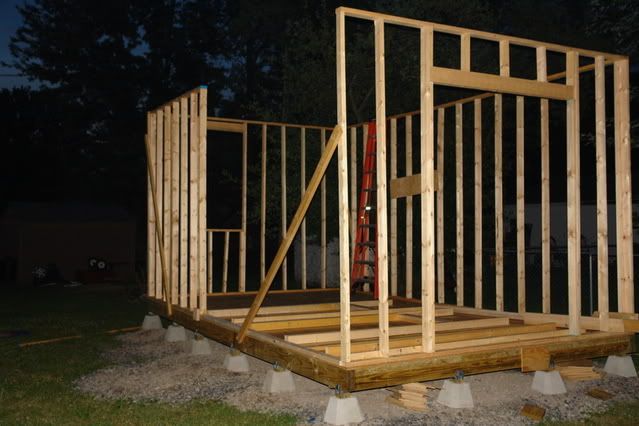
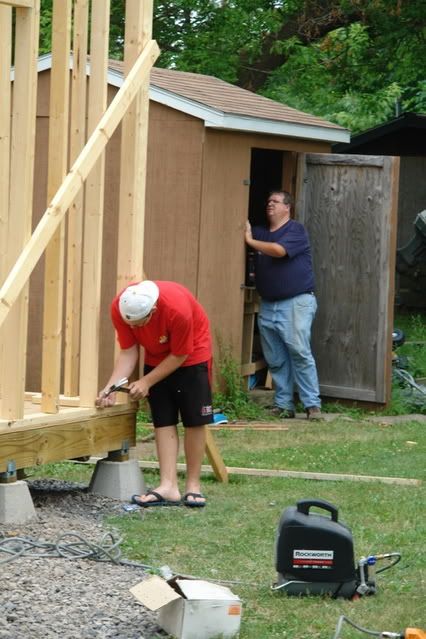
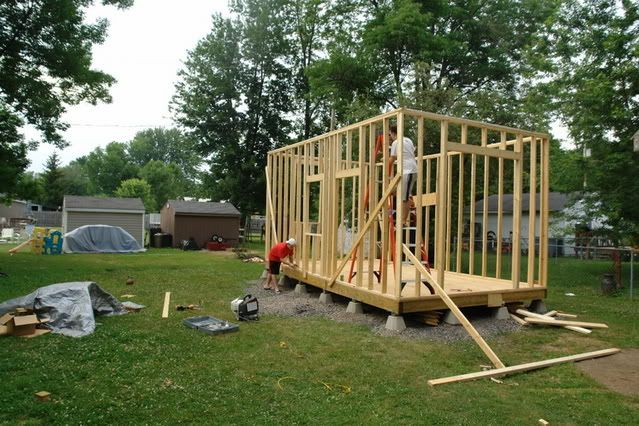
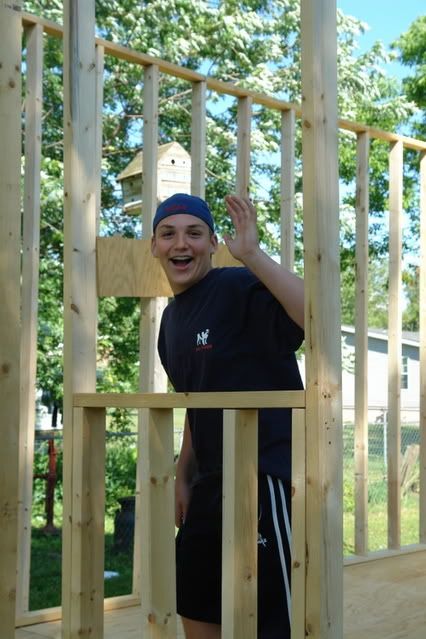
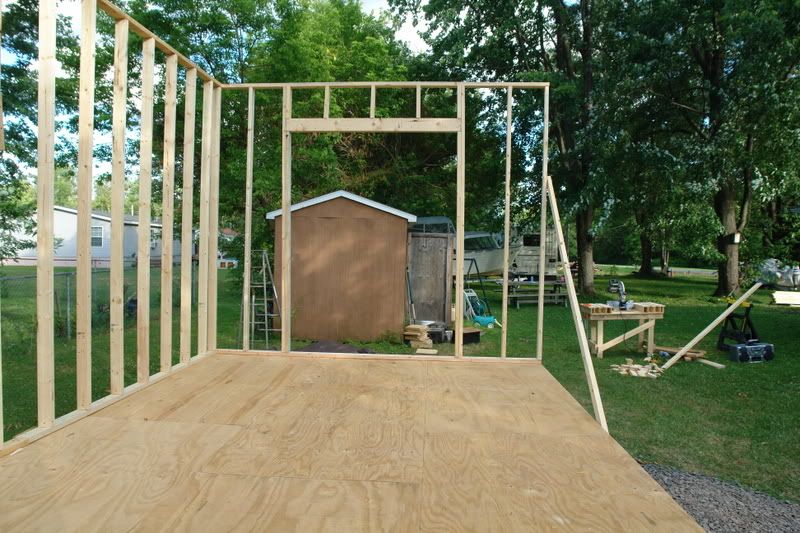
Adam and James helped with the lifting and so forth on this wall pretty cool huh? As you can see there will be a door and window on the front expanse, the big double doors will be for tools and large projects, and occasionally for ventilation and/or cleaning of the shop.


After getting that wall up, I cut and installed the top plate, which tied the whole shebang together. (or started to)

We borrowed a ladder from the fire house (thanks Lori!) and it sure did come in handy. I've since been loaned two 'little giant' ladders (one real and one clone) which are those talented flip/fold extension ladders. I Know the budget won't hold a real Little Giant, but the Gorilla ladder which is a clone of the little giant sure seems to work just as well, so I'm saving up for a 21' Gorilla sometime next month.


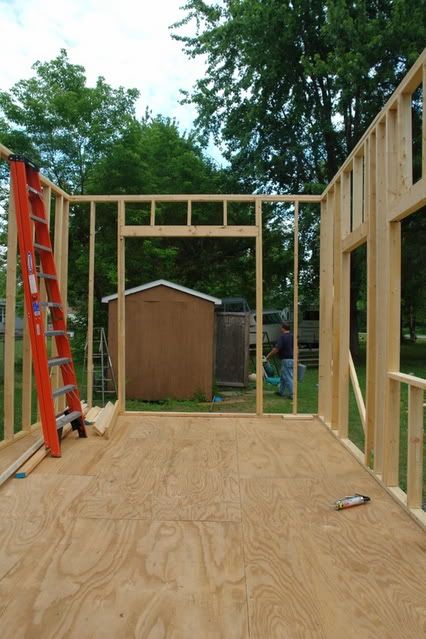
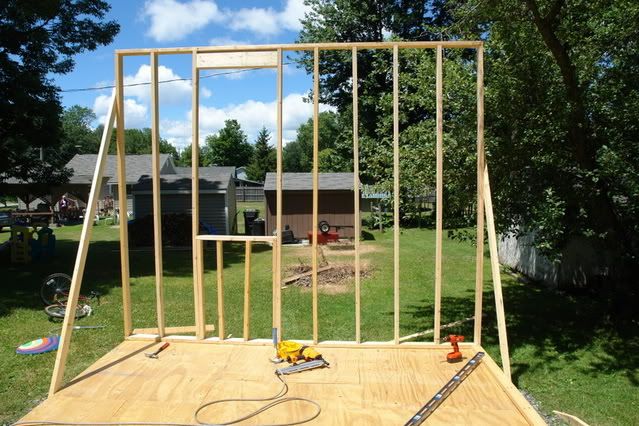
There is the view from the far wall looking back at the main door. It has been almost three weeks since things looked like that, what a nice view though, no?

By the end of the day, my left knee was complaining about the ladder work, so I pressed James into service finishing off nailing the top sill in place.


At this point, all three boys have helped build the shop, and actually today, Lori got involved as well, but that's for later in this post.


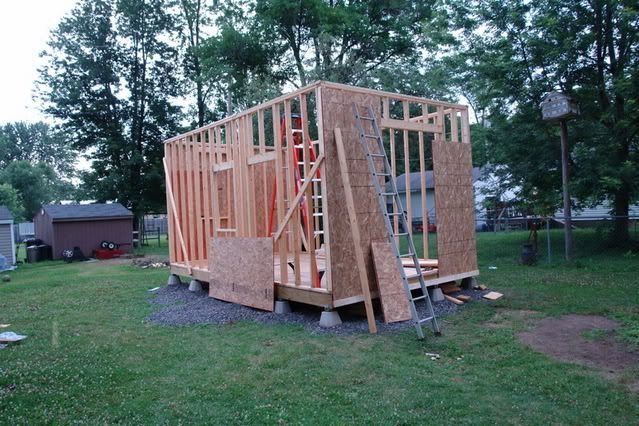
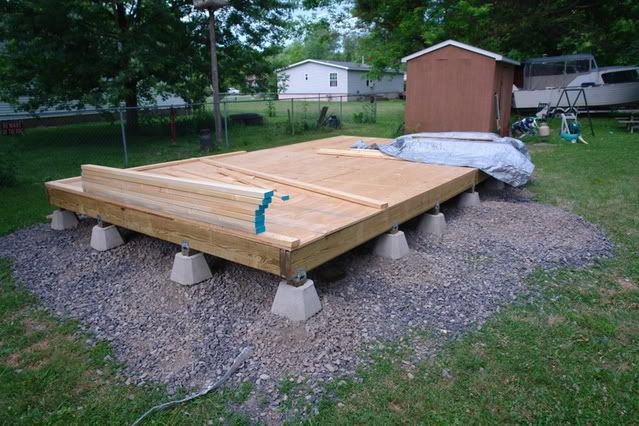
That just about wrapped up the weekend, and some time the next week, Grizz and I got this done:
That's 5/8 osb sheeting. We manhandled that into place after screwing a level board into place to hold the sheets until we got them nailed off.
Thanks Grizz!
That spindly little ladder sure wasn't cutting it, so that's why My friend Mark loaned me his Gorilla and I asked Stu for his Little Giant.

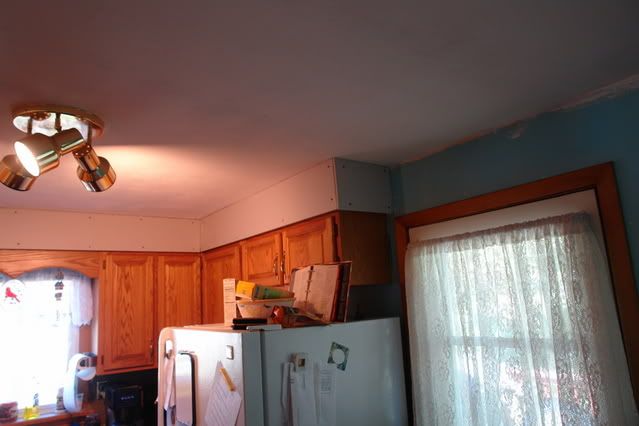
Rain and a busy wrap up on my month at work ( for bonus purposes) meant that I didn't get a lot done until last weekend. I even took half a day and helped Grizz out with re-rocking his kitchen. It seems his wife and daughter did some of the demo on it while he was out working last week. He called me Saturday morning, and by the time I left Saturday evening we had it looking like this:

ready to mud and then paint. I wonder how it turned out this week. Hmmmm


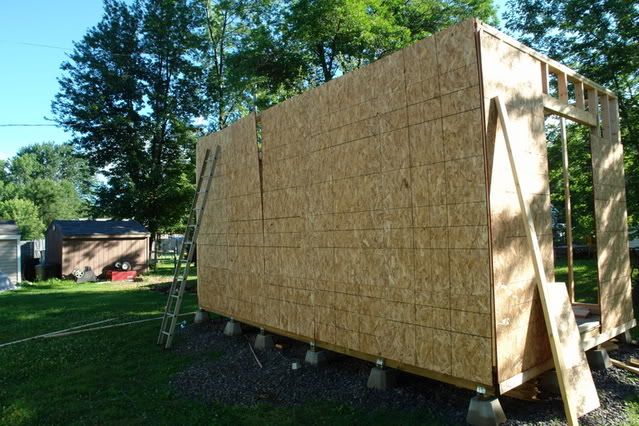
Before I scooted up to Fulton for Rock duty, I pressed James and Adam into duty for the long wall OSB. In about three hours we managed to get the last wall up, mostly without mishap, and Just as I ran out of nails for the nail gun.
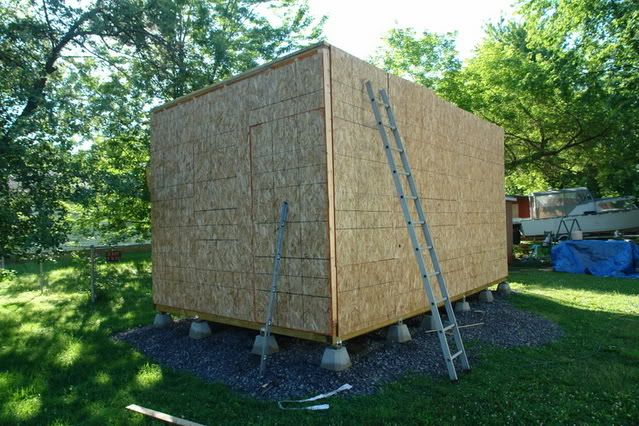
Mark and I had finished the front wall the night before, and it looked something like this in the morning:
there was one sheet which needed a slight trim to fit, and we ran out of daylight before finishing that up. The boys and I eventually got the last wall up, which went very smoothly thanks to the two of them. I can't say how much I appreciate everyone's help on this project, Thanks guys!


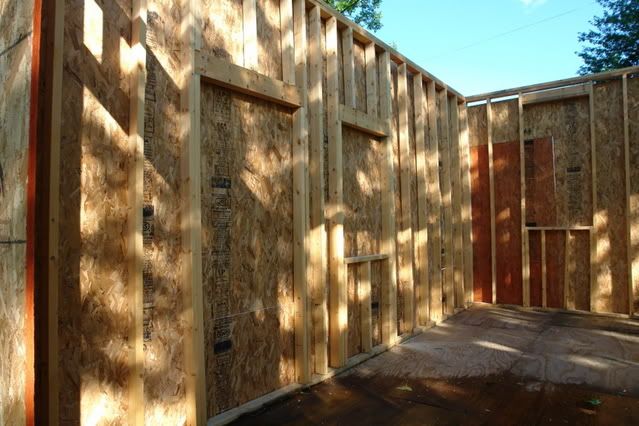
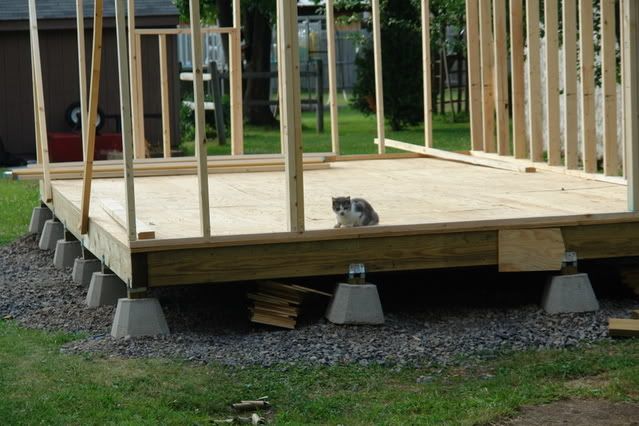
here's the inside view by the mid morning light. Starting to look like a building now!


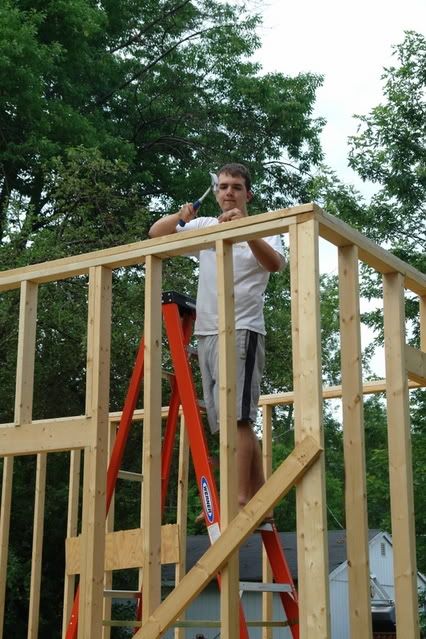
The boys and I took things from there: we first nailed up the 'strippers' as one framer wrote to me, once the short strips were installed the two boys would hold up the panel and I'd nail it off with the nail gun.

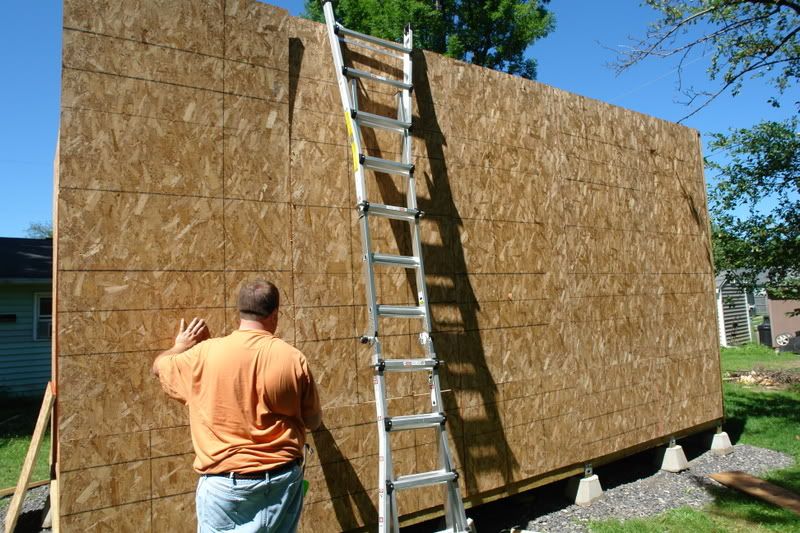
Occasionally I would hold the panel while they moved the ladder and the nail gun:

there's Mark's really snazzy ladder. Thanks again Mark, it sure has come in handy!

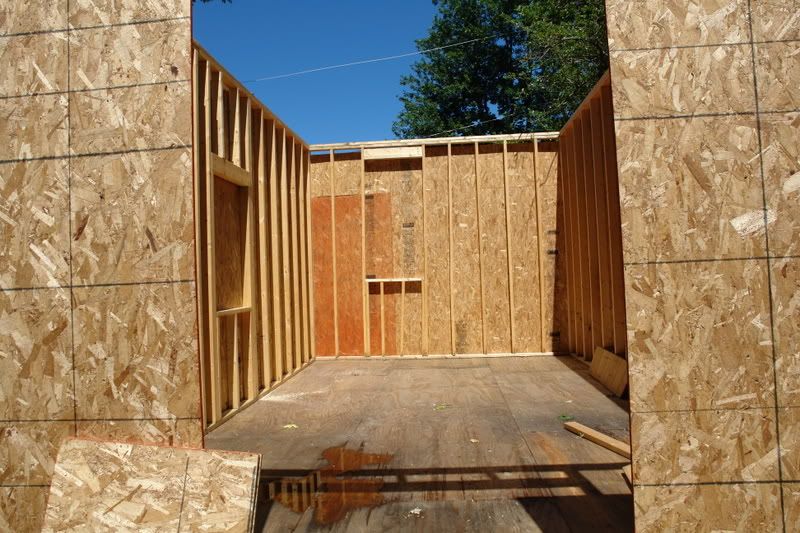
This is how things looked through the doorway by the end of the morning: I left the end wall panels 'wild' and cut them off last night after work.


Man that sure does look nice! Still a long way to go, but I'm one major step closer to having the shop up.
Patrick had to inspect things too, I hate to say it, but I lost my temper at one point, and there is a hole to patch in the back wall. He wanted to see it, as his brothers though it was hilarious.


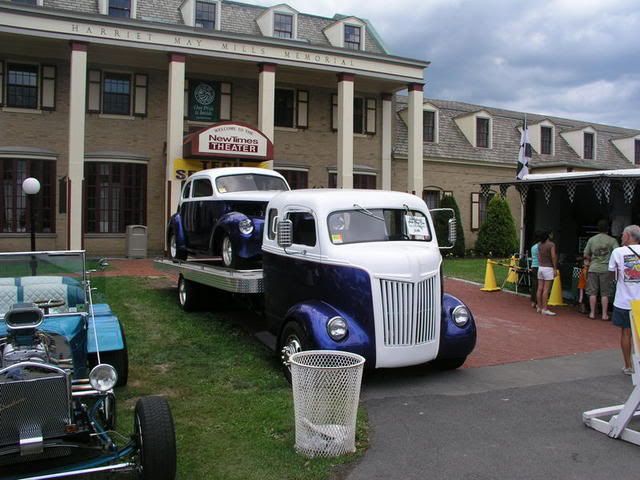
Sunday, Lori and I took the boys to the Syracuse Nationals car show. We had a ball, and I have loads of photos. There were about 10 '69 chevelles at the show. This rag-top was just gorgeous, having recently had a frame off restoration.


This combination is a local shop's pride and joy. Gotta love that pairing.


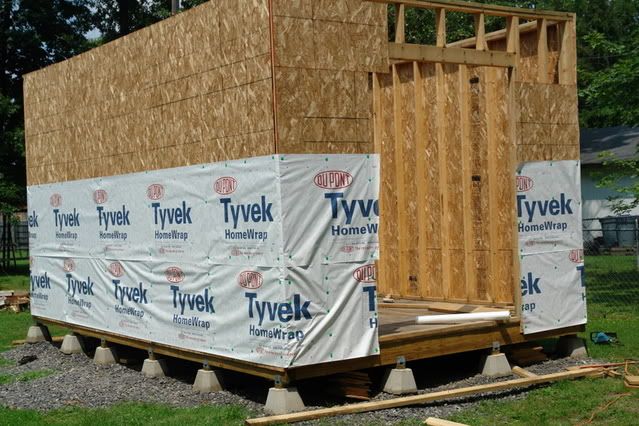
As I said, this past week had me very busy at work, and when I came home I just plopped down and didn't want to work on the shop much. Also, hanging tyvek is a two person job, and it was a lot easier with Lori's help today:

I think I need to buy one more roll of Tyvek, which will have to wait just a bit, as new eyeglasses ate into the budget yesterday. (Middle age, gotta love it! can you say Bifocals? Thanks to Brother Ben Franklin I will be able to see up closer better than I do now)

Lori and I snapped chalk lines last night, before dusk put an end to the evening.
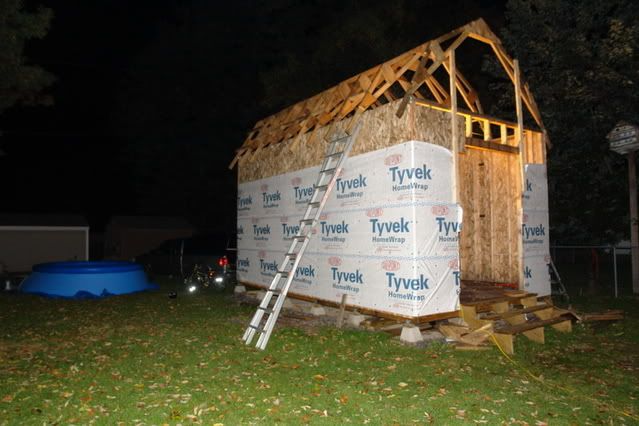
Here it is after two laps around the building, which all in all went rather quickly. I did smash a couple of finger tips installing the plastic gasket-ed nails. And promptly was reminded of Garner's law. Anything you injure will get hit at least three more times before it heals. Bill was a professional roofer for a LONG time, so I will bow to his wisdom and experience in this matter.

OW!


as you can see, dusk was approaching, so we put the ladders away and finished things up for the evening. The three tiers of tyvek are nailed off at the recommended spacing, and the seams are all taped off with house wrap tape from Lowes. Specialty product which I hope has some super formulation of glue, just seemed like blue and white packing tape to me, but what do I know?
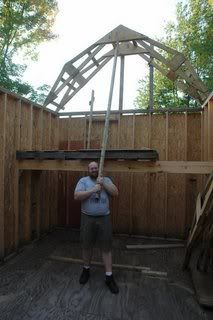
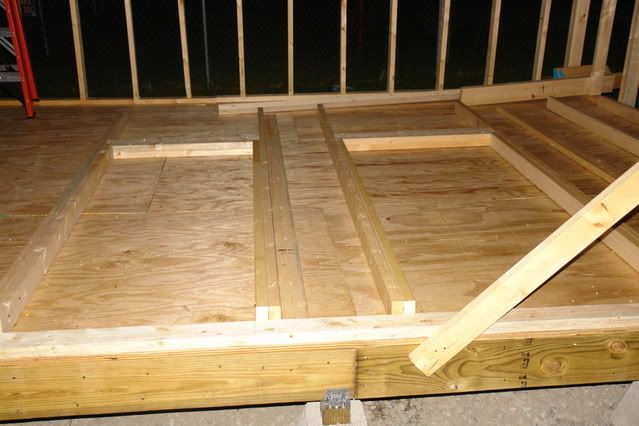
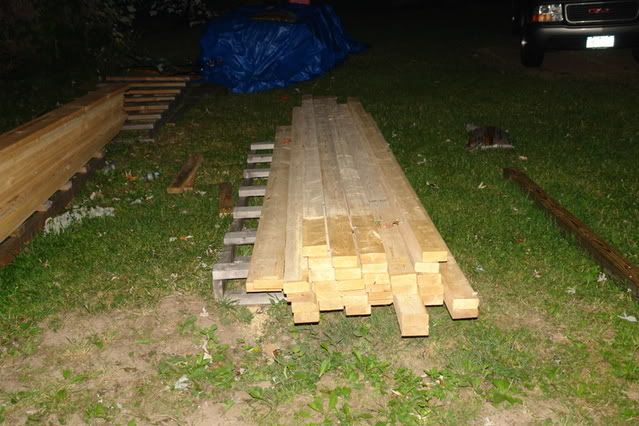
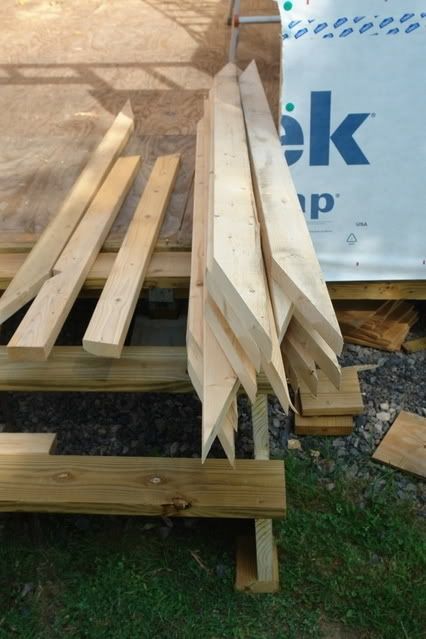
Tuesday, July 10, 2007

Well, the best laid plans... I hoped to put the final wall up on Wednesday, the 4th of July. Well, rain foiled that idea. If Lori and I hadn't snuggled back down for a nice rest in the morning I suppose I could have managed to get the wall laid out, if not lifted into place.


As it was, I did this on Thursday evening instead:

I had nice sunshine to do some more work on the last wall. It was just Patrick and me, so I knew I wasn't going to get it all the way done, but we got a lot accomplished.


I cut the studs, and laid out the wall in two sections. One 8' long and the other cut to fit the remaining space. 11' and change (had to allow for the end walls yaknow)


laid out the window and doorway, nailed up the headers for each of them. Both will top off at 80"
I ran out of daylight before I could finish the complicated half, though.

Patrick helped me by holding the far end of the small wall section, while I nailed it off with the air nailer. He was startled a bit by the noise, but liked the results. At his encouragement I went ahead and lifted the 8' section into place and tacked it into place:
We ran out of daylight, but that was a pretty good start on the last wall.


At this point, I decided to stop for the night. (Not that I had a whole lot of choice in the matter).

Here is the wood pile,I've used up all of the 2x4x10' boards, and what is left are the 2x4x12's, 2x6x12's and 2x8x12's (which are the joists for the loft) Other than the last joist, I've done pretty well on the pre-order for lumber. I think I'm going to need a few more 2x4x12's, above and beyond what I have stashed down in the storage unit, plus what is on the skid there.

Friday evening came and went with zero progress, I was just wiped out after work this past week, despite the day off in mid-week.


Saturday, both James and Adam pitched in and helped me finish up the last wall:


at this stage it is just tacked in, no top sill in place yet. HOwever it is UP!
Both boys were a HUGE help this past weekend, and I'm quite proud of them.

I did most of the high ladder work, while James did the cutting and ground work. calls of 'Nailer' and 'goop' (for the construction adhesive). I kept him scurrying around, while I did my stair stepper exercises.


Adam L. meanwhile, is the expert at toe nailing the walls into the deck.


James tried his hand at photographer, while I was putting away the tools. I really was as tired as I look there. (ok, maybe I don't look tired, but I sure was!)


We ran out of nail strips for the air nailer on the last top sill board. I put James to work at that point nailing in more sinkers to secure the top sill.

His nickname at this point is 'Mater'. That's like Tuhmater, without the 'Tuh'!


Again, I'm SO proud of my boys for pitching in. all three of them!

the heat index has kept me inside this week, it is supposed to cool off tomorrow, so I hope to get home and get some trusses nailed together. If it is raining, I might schlep over to Newport and borrow a ladder from Stu. ALthough judging from the email I got this evening, I think I may put that off awhile. Hope you feel better soon, Stu!

Monday, July 2, 2007

Weekend Progress


Welcome back!

After a week of little or no work on the shop. it was a busy weekend with a Lot of progress. Adam was a huge help to me this weekend, before an allergic reaction to pressure treated (we think) sawdust sidelined him. Thanks again buddy!

Even after I sent him to the showers he came out and helped me when two people were required. (lifting walls up)

Saturday, he and I used a simple floor jack to lift the deck remove each pier and shovel more stone under each one to better support the shop. After leveling the pier, Adam wound up nailing in the back of the joist connectors, I did the heavy lifting of the piers as he shoveled stone. We did them a few at a time, but finally wound up with the deck as level as it is going to be to start off. It is built on grade, and will be subject to shifting and frost heaves in winter.
It looked for awhile like we'd be rained out early Sunday morning. by 10:00 or so the weather cleared up and we started in again. I started with the far wall, opposite the main doorway. I decided to use the larger of my two windows I was given last month on this wall. It is literally the first framing I've ever done. I hope it holds up (ha ha ha).

You may notice that there is no sill plate on that wall. Last weekend when my buddy Grizz and I started working on the trusses we nailed down the sill plate. Not just a couple of nails, a LOT of nails. I was not going to pull it up. Instead we just built the wall without the sill and then toe-nailed the wall in. after raising it up. I screwed a couple of scraps of plywood across the bottom of the boards to keep them relatively stable while I raised the wall.


There it is. The first wall!

the caption for this is:

"Hurry up and get a photo of this!"

note, no bracing is nailed off yet.

The window sill there is 42" from the floor, the window is 66". yep, that's one tall wall!

That window will get me the afternoon/evening light in the shop.

all braced up, much better than me holding it up for the duration. (wouldn't get much done that way would ?) That wall took us about an hour and a half to do. Not that the time was important, just a note.


About this time was when Adam discovered his dermatitis, so I sent him off to the showers, and he only helped occasionally from here on out, basically when he was absolutely needed. (pretty much helping when lifting the walls into place, primarily)

I cut and laid out the 17 studs for the long wall. It is the simplest of the four walls, no windows or doors, just 20' of structure. This wall too had part of the sill already nailed down. It was fun getting this one lifted into place. Wound up putting it up in two pieces, with a frantic repair of the top sill which came apart when we tried to lift it.

Long ago on a family canoe trip, there was a Lew and Phil creation known as the Unstable table. I've discovered its progeny, the Unstable Ladder. the only stepladder we have is one which really needs to become artwork on a wall somewhere, as it is just about beyond its useful life. Adam braced the ladder and I went up as far as I dared, and attempted to nail the two sections back together. I'll get it secured later on when I put the 2nd top sill layer on. for now, I'm leaving a plywood brace screwed in to help hold things together.


There's the long wall. with the ladder of ill repute.


Halfway there!


Now for the main doorway wall. The walls are 10' tall, and the plans call for a 6' wide double door for the entrance of the barn. I'm adding a 'man door' on the long wall facing the house, so this doorway is mostly going to be for tools and projects to enter and leave the shop. I decided to keep the doorway in scale with the building height wise. I bumped the doors up to a full 8' tall, keeping them 6' wide.


That is about where we wound up. I was pretty sore by this time, and I've decided that cleanup needs to happen before darkness falls from here on out.

Now for a few fun photos.

I have an official shop cat now. Miss kitty supervised all weekend, investigating frequently, and making sure the materials measured up.


Looks like the neighbor's crab apple tree is going to get an overdue trim in the next couple of weeks,hmmm? there is still a floor and truss system to go on top of that 10' sill plate. Actually it is more like 12' at this point, thanks to the piers, plus the 2x8 rim joists etc.

there's a view of what lumber I have left. I'm running out of 2x4x10's, but that's just fine, I know I bought a few too many 2x4x12's, and if I do run out of anything there are a few extra pieces in the storage unit just in case. the pile on the left is the stack of 2x8x12 for the loft joists.

And lastly for tonight (er, this morning, looking at the time... eep)
there is the view looking back towards the main door from the far corner of the shop.


In the background you can see my chopsaw stand, with the cutoffs strewn across the lawn. I'm happy to say that they're mostly 8" or less in length. There were a couple of longer ones, but I've saved those, knowing full well that there will be plenty of opportunity to use them up somewhere!

Thanks for looking!

Thanks again Adam!

Saturday, June 30, 2007

Little bit of progress:

Didn't make a whole Lot of progress today, before the rains came, so here are three 'virtual' shots of the shop. First looking across from the main double doors toward the windows.


The tables and cabinets represent my benches and tools. (yeah I could sketch-up it, but i know my old software and why spool up on sketch up when I could be building the shop?)


the window on the left is a 32x44" vinyl clad, and the far window is 32x66" a replacement 'drop in' which I'm putting on its own wall. with 10' walls to the sill, I have the luxury of keeping the window above the bench and still have a decent view.

here is a shot from the 'far' corner of the shop looking across to the three doors:


funky, huh? the blue section in that image shows where the loft ends, and that far half of the shop will be open to the trusses above.


oh, and for those who prefer a real life view:


and the matching view from the cad program.


if the rains end by morning, the boys and I are going to either attempt to build the trusses again, or put up some walls, either way we'll make some progress!

Sunday, June 24, 2007

Non-shop update

Saturday's Masonic event went very well. I was a videographer, who helped transmit the Grand Master's investiture of his grand line officers on the Masonic Care Community's cable system. Seating in the chapel is limited, so we pipe it over to the admin building for 'overflow' seating. My best friend Stu is the head of the technology committee (who are we kidding he IS the technology committee most of the time), and when he put out the call, I was more than happy to help out.

Today was graduation day for James' girlfriend Gabrielle:
(note to self, tomorrow when you have a moment, insert photo here)
I've got tons more images, but that's the only one that doesn't need Major editing to look decent.

I did do Something shop related today, I zipped over to the blue borg (Lowes)and picked up some hardware and a couple more carpenters pencils.

thanks for checking in, more later, I'm off to bed.

Friday, June 22, 2007

Best laid plans....

Well folks,
tonight was an exercise in frustration. Grizz stopped down. We surveyed the flooring, decided that a little adjustment was in order and fixed the one corner before moving on to truss assembly. We started laying out the parts for putting trusses together. Last year before closing up shop with John, I pre-cut enough truss parts for 9 trusses, which is what the 16' long barn requires. My barn, however is 20' long, so I'm going to have to fab up a few more parts. That was where we Started. We ponka'd (installed with framing nailer) two boards down which will eventually wind up as the sill for the walls. Then we measured out 29 3/4 on one wall , and 52 1/4" on the other wall. Setting those marks allows us to use the wall parts as bracing to build the trusses. Or try to.

We laid out the 4 short rafters, two with birds mouths and two without, each cut to the appropriate angle. We then took a 10' 2x4 and traced the cut line to make the long chord of each truss half. That's when things started going 'wrong'. No Injuries (this time, the Vorpal Staplegun (Vorpal is a Dungeons and Dragons term for really nasty) stayed away, so we were safe, only using the framing nailer and circular saw. the long chord of the truss assembly runs from the ridge joint to the birds mouth on each half of each truss. My plans show a board which gets sandwiched between three gussets, connecting the shorter legs, forming a triangle. Two relatively 'flat' triangles combined with the floor of the loft work together to hold up the roof, while still allowing access to the loft.

I traced the line across the board we tried to use, and Grizz made the cuts. If things had gone right, we should have had at least three or four trusses completed by sundown. IF.

it turns out that when I cut the gusset parts, I mis-measured, so I have 22 incorrect gusset parts. guess I break out ye olde checkbook and get another couple of sheets of 7/16 plywood. I could use some in the pile here, but they're earmarked for the roof itself.

I got a wonderful email from my cousin Emily. It seems that I'm Not just writing this to myself, I actually have an audience. (hooray!) (I was beginning to wonder) Thanks for checking in Emily! I sure do hope Lew is watching. Knowing him, tonight he is laughing at the keystone Cops routine.

I have been tapped to help out at the Masonic Care Community in Utica tomorrow for the incoming state wide officers. That will pretty well negate any chance I have of getting any decent sawdust created. ah well, I can always get out the floor jack and level the piers, IF I get home in time to do anything. Sunday afternoon is shot as well, so I've resigned myself to the shop being delayed a week. Not that I'm on a timetable, but I really want to get it dried in 'soon' so I can start moving tools up to the shop from the storage unit.

I think I'm going to try and get at least four sheets of ply and move them plus my table saw up to the house Sunday. I'll have to put the saw Back down in the storage unit Sunday evening, but at least I'll be able to cut the truss parts before heading off to Gabrielle's Graduation party.

speaking of fabrication work and trusses. The plans call for rafters/trusses 24" on center. I'm seriously considering making 5 more trusses total, and putting them 16" on center. That will help compensate for any higher snow load. Last winter we got hammered by a few northeasters, and in some spots we had 10' of snow AFTER it settled a bit.


Sorry there weren't any pictures tonight, just too ticked off to take any. Not much to show, since we mostly just moved wood from one pile to another while scratching our heads a lot.

More tomorrow, after I get home from the Masonic event.

Wednesday, June 20, 2007

Major update time

Well folks
I've been remiss in my blogging, but for a good cause.
Saturday went pretty well, all told. I got most of that 'punch list' done. Grizz and I bought hardware, I got the propane refilled and bought more landscape cloth, which I late returned.
Photo Sharing and Video Hosting at Photobucket
Left to right, that is Grizz, Sean and yours truly. The three of us were scratching our heads looking at the site and discussing the options to level it off when Don the rock guy called. An hour later, we had this backing in through the side yard (borrowing the neighbor's lawn)

Photo Sharing and Video Hosting at Photobucket
approximately 5 yards of gravel dumped roughly in the center of the shop site.


the LOML was shocked to see the pictures of the stone delivery. I guess she didn't expect an 8 wheeler like that in our back yard.

This was a multi-wood forum project, with Grizz from the WWA and Family Woodworking and my friend Sean from over on Woodnet helping out in a Huge way. Both guys brought tools and while we didn't use them all, the framing nailer was a great help, once we got better nails. 3.5's would jam occasionally but 3.25's worked just fine.
Sean took over the site prep and with my help we went from lumpy/wavy ground to 'screeded' stone, level in both directions. While we were doing that, Griz's circular saw reciprocating saw and sawhorses came in very handy, cutting those extra truss parts and joists.

Photo Sharing and Video Hosting at Photobucket

That's Sean, aka the Rockmeister/framer/all around great guy. After smoothing out the stone, We ponka'd the rim joist into shape, and got creative when it came to squaring up the frame. I don't have a maul or sledge hammer, so I suggested that Sean use one of the concrete piers, three hits and it was square.
By the end of the day, this is where we wound up:
Photo Sharing and Video Hosting at Photobucket

Somewhere in the middle of hanging the joists, I realized that I miscalculated the number of joists required. We wound up 1 joist short, which I didn't realize until Sunday after my lumber guy had delivered 10 2x8x12's which I had forgotten to order, but will need sometime next week.

That took a trip to Lowes and some adjustment to the materials list. they were Out of 2x8x12 PT, so I got a 2x10x12 with correct hanger instead. makes the entrance to the shop just a tad stronger than the rest of the floor, darn.


I briefly toyed with the idea of leaving the frame directly on the stone, but 'slept on it' and decided to put the piers back into action after all. Sunday went very smoothly, thanks to James and Adam, my two stepsons. With their help (thanks guys!), we got to this point:
Photo Sharing and Video Hosting at Photobucket

Another new friend Mark from over on WOodnet came by as well, and despite him stapling his own hand with Lori's newfangled staple gun, we got a lot accomplished by dusk. Not 5 minutes after Mark stapled his hand, Lori did the same to her own! Ouch. both are recovering nicely, thanks for asking

Sean was back on Monday night, and we got more insulation installed and a few sheets of plywood installed as well when the insulation ran out.

Photo Sharing and Video Hosting at Photobucket

Tuesday evening, I picked up two more rolls of insulation and then installed them. Rain was fast approaching, so I called it quits with the deck looking like this:

Photo Sharing and Video Hosting at Photobucket

Tonight, I'm not out there at all, I'm very tired tonight, so I'm going to avoid power tools and get some shuteye. Thanks for looking!